Six Steps to Successfully Retouching Photos

More and more it is becoming a common place that the average individual has some sort of design editing software that will enable them to do advanced editing on their photos. As technology progresses, so will the ease of making your photos unique, your own, or fixing your photos from things unwanted!
For this process I am going to use Adobe Photoshop. Most of what we will talk about is the same if you use any type of layered design editor, such as Affinity Photo or Darktable. There are now a number of competing products on the market, both free and paid.
The first step to photography retouching – saving your file
Create a separate file, a copy of the image you are going to be working with. Typically, I create a file with the same name structure, however I add something like "working_file" at the end of it. That way I know which file is the original and which one I am working on.
Plus the working file will show up right next to the original, which makes it easy to see what is going on when you start to amass many photos.
Successfully retouching photos, step 2: unlock your layers
I like to unlock my layer before I start working on any project so that if I want to make some changes throughout the product, it is ready to go. For example, I might want to add from behind the original layer, or I might want to make a copy of the original layer. There are lots of reasons for this, so I just get in the habit of unlocking at the start.
There are a couple of ways to unlock the layer. You can either, click the "PADLOCK" and drag it to the "TRASH" icon at the bottom of your layers panel, or you can hold the "OPTION" key on a mac "ALT" key on a PC and double click.
Either way is fine. You can even duplicate the locked layer and delete the original. No one way is right, so pick your choice.
Third step to retouch your photo: make a new layer
When I am successfully retouching photos, I like to do all my editing on a fresh clean slate, that sits on top of the layer that I am trying to edit. This way I am not working on the original layer and I can also deselect the original layer to see what I am actually doing, as an isolated layer.
There is an alternative method, as there is no one way to make this happen, and after you read this and start to try this out on your own, you will probably set up your own method and steps to getting to the same point.
However, you can, as some do, choose to make a copy of the original layer. If you are going to do this, call the layer that is original, something like "ORIGINAL" or "BASE", something to tell you that it is the original layer. Then you can name the other layer "WORKING". I do not like this method as much as you have to delete out around the layer on top to bring the original layer from the bottom up or you have to use a layer mask.
Either method you are going to get to the same result, a working layer that is not the original, so you can freely paint, erase, expand, or whatever needs to be done and not worry about the original content. Plus if you get to a point that you don’t like what you are doing, you can just delete the layer.
Step four in retouching photos: grab your colours
You are now ready to start to set up your pallet and get your colours and brushes ready. I learned how to fix photos before there was anyone using photoshop. Even though Photoshop came out in the early 90′s, there wasn’t anyone using it to fix photos yet, not as a mainstream (here’s fun history on Photoshop).
Back then in the 90′s we were fixing photos by hand. We would use a series of specialty pens designed to work on photos. The philosophy back then was to work slow, build up lightly, with the main concept that less was more. Typically you only got one chance at it because you were working on the ORIGINAL PRINT.
So, it is that style of photography retouching that I bring into Photoshop, which maybe very different then a modern day student learns. Which, I stress again, there is more than one way to do this, you need to develop your style.
The first thing I do is press "B" on the keyboard for "BRUSH" or you can click the brush icon on the left. Then I like to start out with 100 size with 0% hardness and a regular round brush. The hardness at 0% will give you a lot of feathering, perfect for blending. I then like to set my opacity down to 20 to start with, building up from the lightest to the darkest colours. I will also play with the flow while I am working.
While I am working, I am adjusting the brush size quite a bit. I use the "[" and "]" key’s to increase and decrease the brush size as I am working. Sometimes I need to get a small brush to get into small spaces.
Other times I use a large brush so that I can cover a larger area, or to sort of splash colour into an area by putting just the edge of my brush outline where I want to go and letting the feathering push colour in.
I start with the lightest colours in the patch areas. You select the colour box and then up comes a pallet chooser, where you get an eyedropper to select the colour. Select the light area and then start to paint.

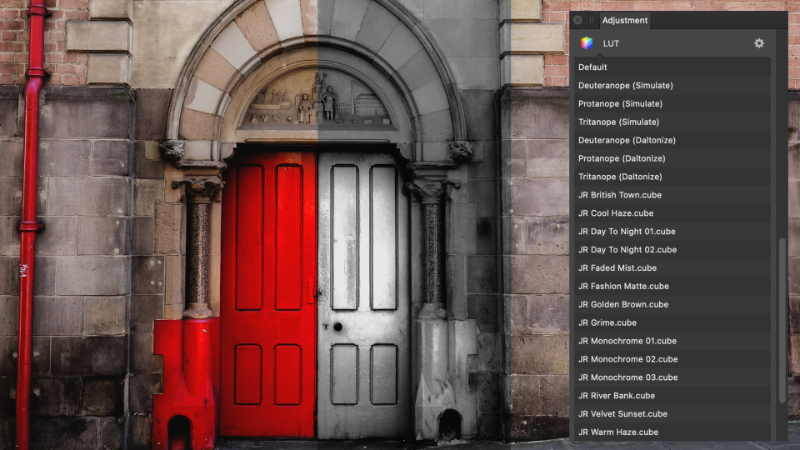
Retouching photos with Affinity Photo (Source).
The fifth step in photography retouching: start to paint
When you are successfully retouching photos, and you start to paint, remember that in this style you are building up, so go slowly and be patient. I start with the light colour and paint over the object. You can then start to pick out colours that are surrounding the object and blend them in. Depending on the subjects of course, if it is a food photo or portraits or a street scene, etc. Building with opaque colours and giving dimension. Some people will also work with multiple layers for each colour that you use.
This is a cool trick as well because now you can add treatments to each layer. I will do this at times however it depends on what I am working on. For this example, I am creating a new layer for the car at the top and then a new layer for the car at the bottom.
In some of these areas I will zoom in pretty heavy so that I can control the detail work as well. Don’t be afraid to zoom in and zoom out, increase or decrease the size of your brush, use the the tools like dodge and burn and even at times, use the eraser tool (if you use the eraser tool to touch up any of your work, I recommend you use again a 0% hardness and keep the opacity down, so you are again, taking away very slowly.
Once the top area is finished, I will move onto the second area. For this I follow all the same steps and processes, starting with creating a new layer. The reason I like to add a layer for each area I am working on is that each area may require further treatments like blur’s, noise filters, or other filtering.
Step five in retouching photos: add textures or filters
The final detail that I add depending on the cover up or photo retouching I am doing, is either a texture or blur, or sometimes adding drop shadows. There are lots of things that you can do to make your pictures pop. Be careful not to overuse various filters or effects though.
Photographers! Earn a $200 Sign up Bonus... |
|---|
Interested? Sign-up here(more details) |
Summary
Finally, that’s it! You’re now finished and you now know how to go about successfully retouching photos. Remember, work slowly, be patient, build your work up and you will be happy with what you get.
Truly I can’t emphasise enough that you do not need to be an artist to make this work, you just need to keep the philosophy that less is more and you will be very happy with your results.
About the Author
Emma Taylor is an Australian blogger and photographer, who lives in Melbourne with her two cats, where she frequents live theatre and wine bars.


